Welcome to my blog, which digs deep into topics such as ophthalmic pharmaceuticals, my kids, doodles, developing iPhone apps, and, starting today, . . . indoor plumbing!
OK, I don't expect this to become a trend, but I had to replace about five Kohler Devonshire (model K-393-N4-BN) bathroom faucet valves in the last year. There was a little bit of a learning curve for a newbie plumber, and I found that I really had a hard time finding help online. So, I thought I'd write this post in hopes that someone doing a Google search for the right keywords stumbles upon it and, as a result, manages to avoid some of the same mistakes I did.
Step 1
Step one, of course, is turn off the water to the sink.

Step 2
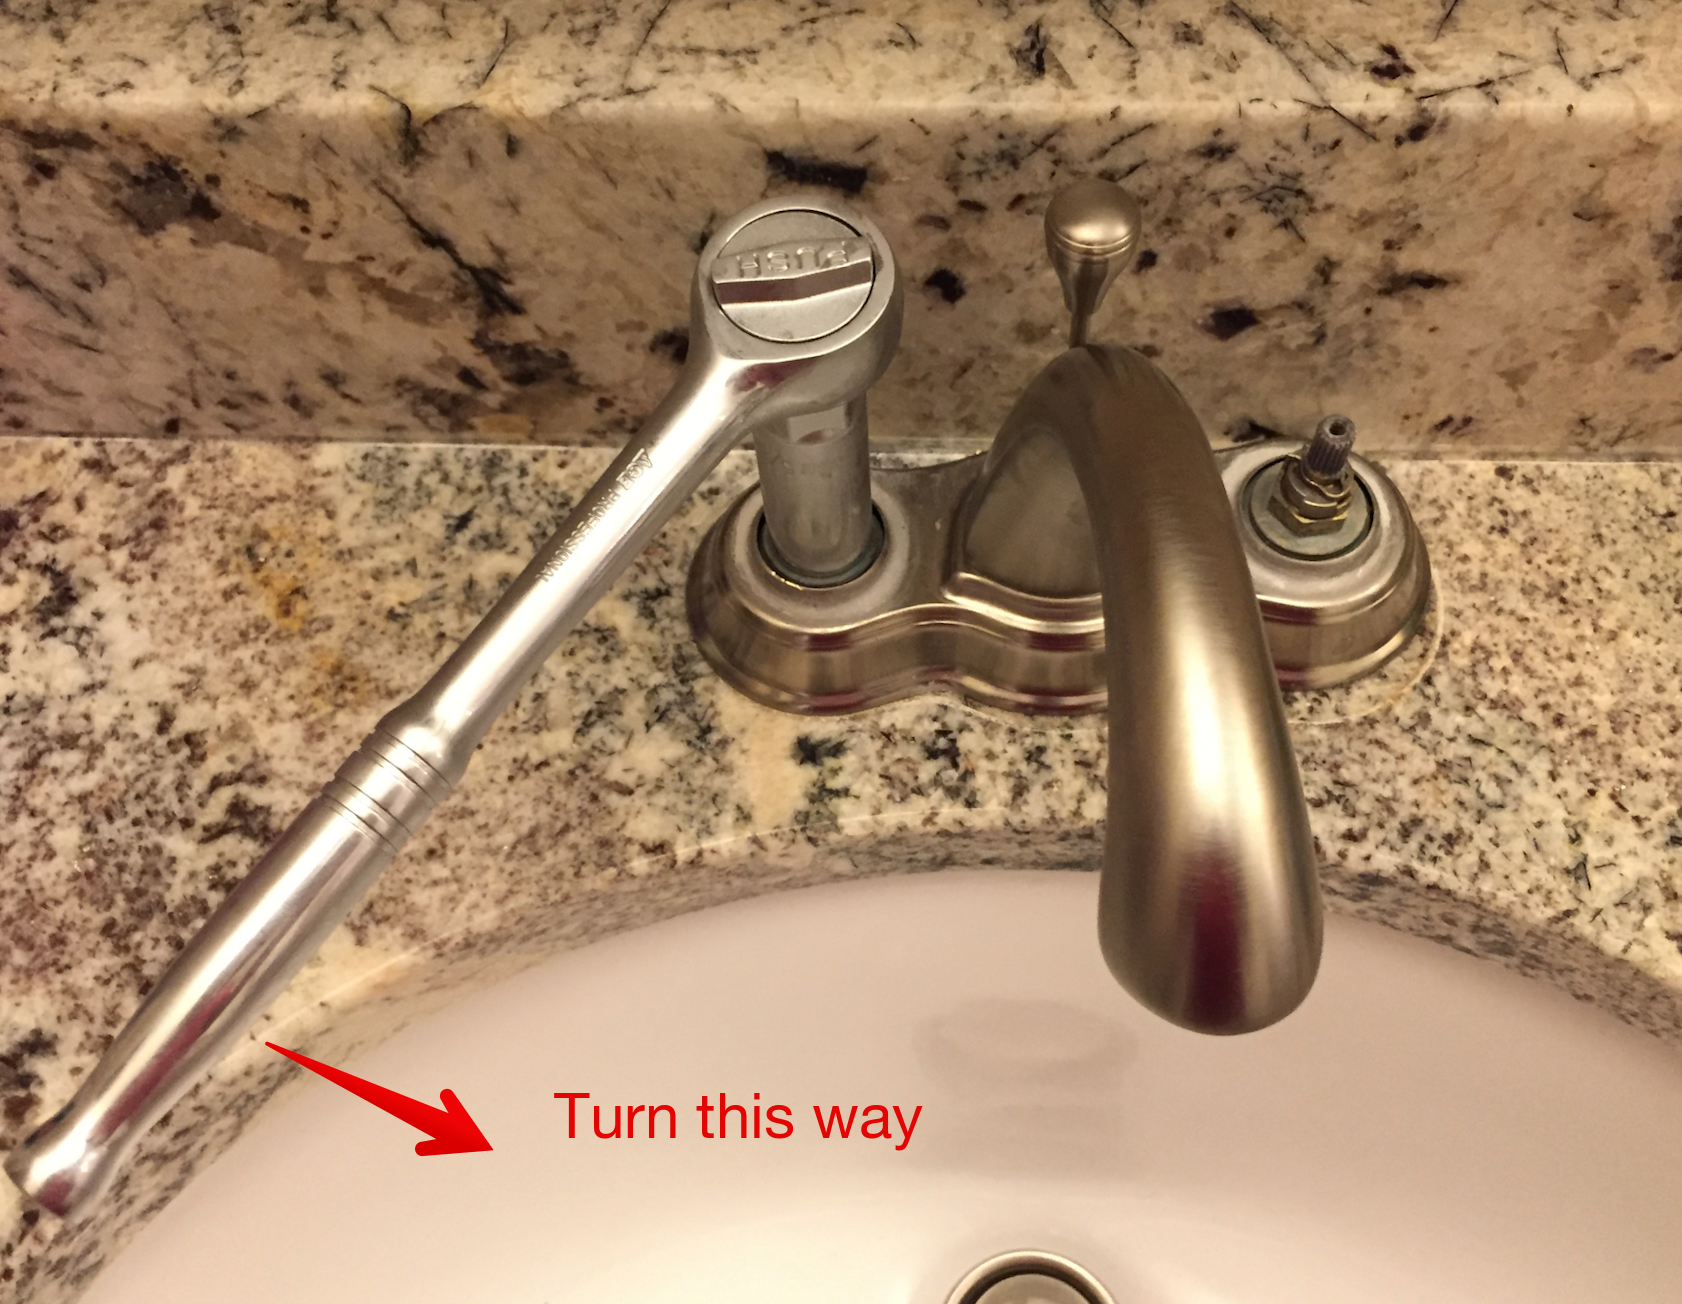
Step two is to get the tops of the handles off. This is where I really struggled. If I felt around the back I could feel a little indentation that I assumed was for accessing a set screw, but none of my allen wrenches seemed to fit in there. Trying to turn a wrench was complicated due to the close proximity of the counter's backsplash.

I did some Google searches for multiple variations of "kohler faucet handle remove" in an effort to see if there were any tricks to removing these handles, and most of them implied that they just twisted off (without a screw). So, I wrapped a handle in a cloth and gave it 10-16 foot pounds of torque, but no dice. I only managed to scratch the finish on the faucet. Bummer.
Ultimately, I figured out that the set screw required a star shaped bit. Once I found my little socket wrench I was able to access the screw and work around the close backsplash.

Step 3
Once the tops of the handles are off, simply remove the screw to remove the base of the handles. But, before you do, take note of the position of the handles, and remember if the faucet was in the on or off (probably off) position when you removed the handles - this will save you some time later!

Step 4
Remove the valves with a socket wrench. These aren't supposed to be super tight but they were for me, which was complicated by my not knowing which direction I was supposed to be twisting them. It turns out they both needed to be turned counterclockwise.
Step 5
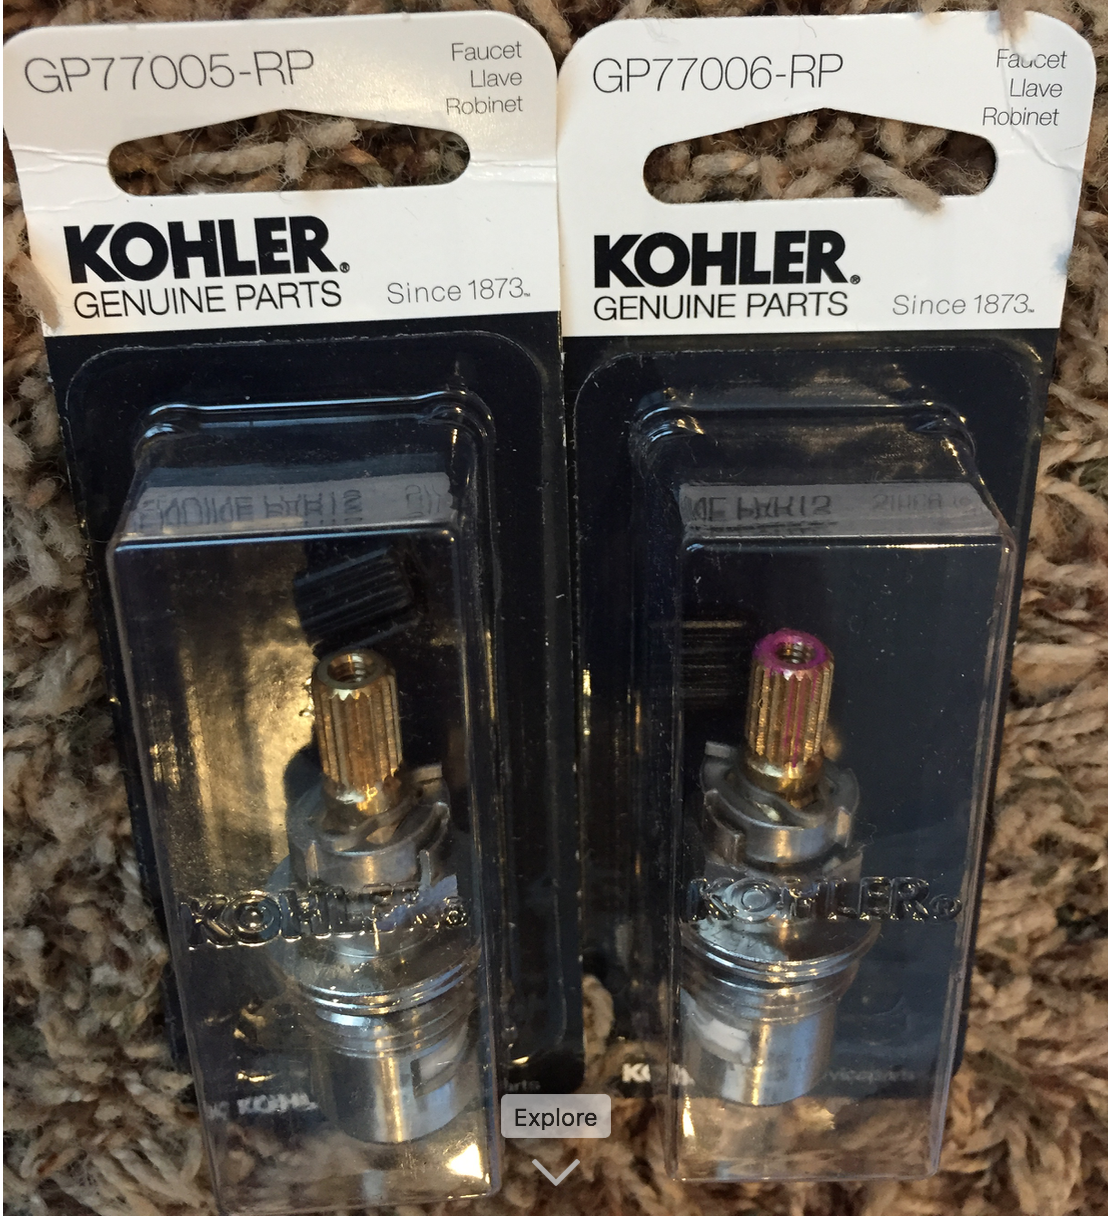
Replace the valves. There are two slightly different valves, and they're not interchangeable. One open by turning it clockwise, the other will open when turning it counterclockwise. One of my valves had red on the tip, which I assumed would be for the hot water. Makes sense, right? Well, it turns out I was wrong.

Step 6
Replace the handles. You might find you need to experiment with the handles positions a bit. I believe the valves are shipped in the "on" position, which confused me because I'd taken the sink apart in the "off" position. This, compounded with having switched the hot and cold valves caused me a lot of confusion. The handles were only turning away from (towards the wall) or the water would turn on in the "off" position and "off" in the on position.
The bottom line is, I'd recommend placing everything into position without screwing anything, then turn the handles. Do the handles turn away from the wall? Next, turn on the water. Does the water flow when you pull the handles forward? Or does do the opposite? Once everything makes sense, screw the screws.
Step 5
Enjoy your new drip-free sink!
